In this post we’ll explore in detail, how I built an automatic water change system for my 600+ litre Arowana and discus community aquarium. This article is part of my DIY on building a large community aquarium that I had setup for my Arowana and Discus fish. That article can be read here.
The key elements needed for this setup
1) A programmable power-socket.
2) Two long PVC pipes–one to bring in fish-safe water and the other to take the waste water out.
3) An aquarium float valve.
4) Four manual valves.
5) Necessary plumbing elements like T’s and elbows.
6) Power supply.
7) A 20/40-watt submersible pump.
Please note that this is a design that I have been successfully using over the last couple of years for my 160 gallon fish tank. You are free to simplify this or adopt only some parts of this based on your requirements.
Getting the plumbing done
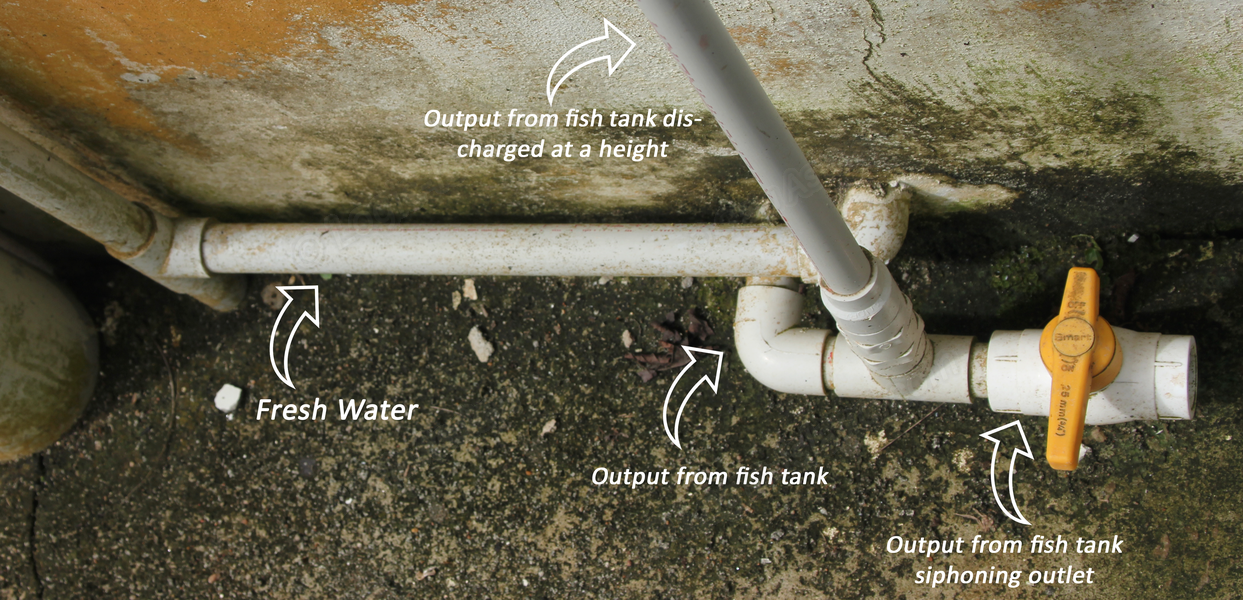
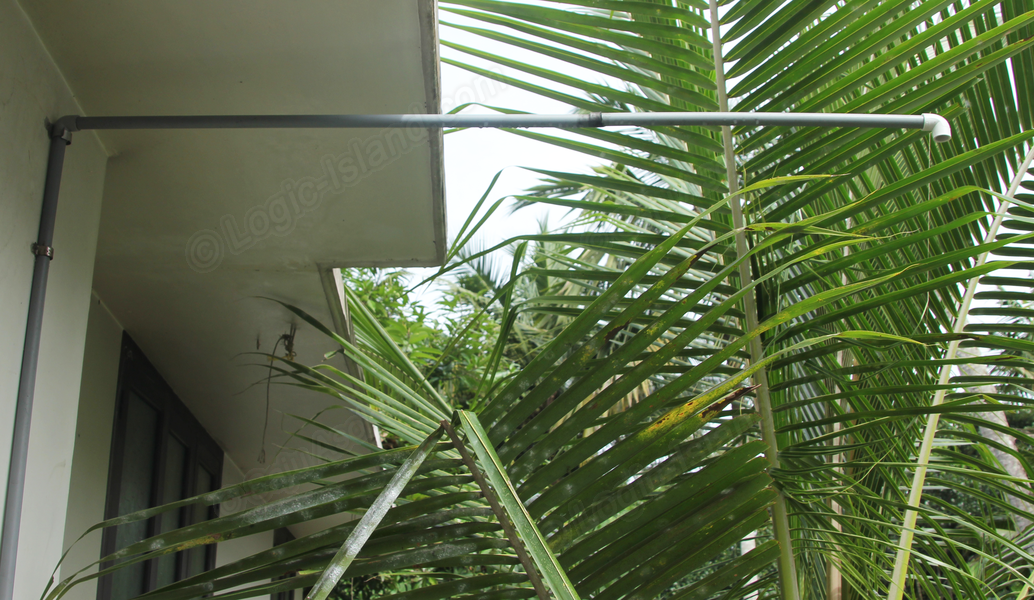
Get two ½ inch pipes run all the way from your aquarium, preferably to a place in your backyard where you have your plants and vegetables, so that the waste water can be turned into free fertilizer. Connect the outside ends of one pipe to your fresh water supply (non-chlorinated). We should connect the wastewater pipe that opens outside your home to a T junction from which one outlet opens at a level higher than the aquarium’s water level. The other end from the T junction should open at the ground level through a valve that we can open and close.The outlet that opens near ground level can be used to drain water manually, when the pump cannot work and can also be used to siphon the waste from your fish tank.
Connecting the valves
Once you have the freshwater and wastewater pipes fixed on your wall, we can build the valve-based system using which you can route the water flow to or from the tank. This mechanism comes handy when you need to clean the tank’s bottom. You can build vacuum using the valve mechanism with which you can siphon out all the waste by connecting a hose to the discharge end of the wastewater pipe. Let’s see how it works.:
We will connect the freshwater inlet and wastewater outlet in the wall next to your aquarium like a bridge with a valve in the middle. This valve will help you route the inlet water to push all the air from the outlet pipe so that a strong vacuum is built inside it, after which if you close this valve, the vacuum already built will suck water out from your tank through the outlet pipe.

Each extension from the bridge will have a valve to control the inlet and outlet separately, should the need arise. Now attach a floating valve to the fresh water pipe immediately after the valve, at an appropriate height.
The waste water pipe’s inside end needs to have a hose connector to which you can attach your submersible pump.
Some electric work
Warning: Make sure you take all precautionary measures when working with electricity and if you are not knowledgeable enough, kindly seek support of an electrician.
Choose a programmable power socket that lets you create programs for each day–i.e. when to switch power on to the socket and when to turn off. Programming is slightly different for each model, but you can easily learn it from the product’s instruction manual. Once programming is done, insert the programmable socket to your wall socket and connect your submersible pump to the programmable socket’s output. Now your submersible pump will fire up based on the timings you set in the programmable socket. Make sure you tie the submersible pump to a level no lower than the mid of your tank. This will make sure that your tank will maintain at least half its water, in an unlikely event should your programmable socket malfunctions and pumps out way more water and your inlet supply malfunctions simultaneously.
How automatic water change works
When all elements are setup properly, automatic water change will work like a breeze. Your programmable socket will fire up the submersible pump for the set duration. The submersible pump will pump the wastewater out from your tank through the outlet pipe placed at a higher level relative to the tank.
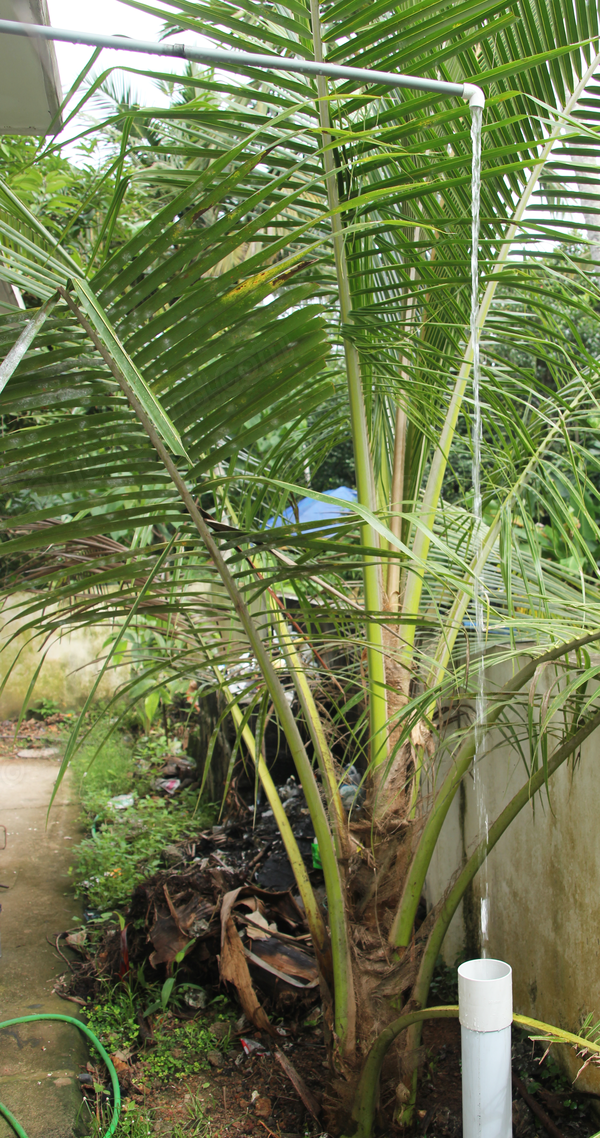
The outlet having a higher level of discharge will prevent water from your aquarium getting drained automatically under gravity, unless you pump it out using the submersible pump.
As water flows out, the float valve will let fresh water in until water level rises to the original level. As the programmable socket turns off after the set delay, water outflow stops and inflow will continue until float valve closes at the desired water level.
Note: It is critical that you let water flow freely out of the outlet pipe without any throttling valves in between, or your submersible pump can get damaged. Also make sure that you refrain from attaching a hose or any extension to the outflow pipe’s outside end, that can reduce the output end’s effective height from the ground and cause water to drain automatically under gravity.
Estimating time for your timer
Switch off your inlet water valve so that fresh water won’t come in when we pump water out to estimate the water level. Now connect the submersible pump to the wall socket and turn it on. Start a stopwatch in your mobile. Water will start flowing out of your tank. Note how long it takes to remove the percentage of water you intend to cycle (depending on whether you do it daily, thrice weekly etc.). Aim for 10-20% max if you cycle it daily and higher volumes if you do it less often. Set that duration in your programmable socket so that the same volume of water gets cycled when the programmable socket fires the pump automatically next time.
Cleaning tank-bottom using this system
This system can help you clean the tank’s bottom easily with the turn of a few valves. Get a one or two-meter-long hose and a relatively sturdy PVC pipe through which the hose can pass freely. Insert one end of the hose through the PVC pipe. The PVC pipe acts as a guide that you can hold in your hand and direct the free end of the hose so it can pick dirt from any spot of your tank’s bottom. Now connect the other end of the hose to the wastewater pipe’s outlet (after decoupling the submersible pump that was attached to it).
Next is the tricky part that builds the vacuum essential for siphoning. Step outside your home and turn the output valve on at the outside facing end, so that water from your fish tank will flow freely out under gravity.
Step back in and submerge the open end of the hose into the tank and turn the bridge valve open. Fresh water will flow from the inlet pipe into the outlet pipe via the bridge and remove all the air in it. Wait for five seconds and turn the bridge valve off. This will decouple the inlet pipe from the outlet, and suddenly the water flowing out from the outlet pipe will build vacuum inside the outlet pipe and will continues to pull water. This will create a strong siphoning vacuum at the open end of the hose you submerged in the tank. Using the PVC pipe, guide the hose to every corner of the tank so that all the dirt gets removed through siphoning.
Once you complete cleaning the tank’s bottom, just lift the hose up so that air gets sucked in and the siphoning will stop. Now decouple the siphoning hose from the outlet pipe’s hose connector and connect back the submersible pump’s output into it. Also remember to turn the valve outside your home off, so that water from your tank won’t flow freely anymore, unless it gets pumped out by your submersible pump.
This concludes the DIY steps on setting up an automatic water change system for your aquarium. Thank you for reading.