Dear fish enthusiast,
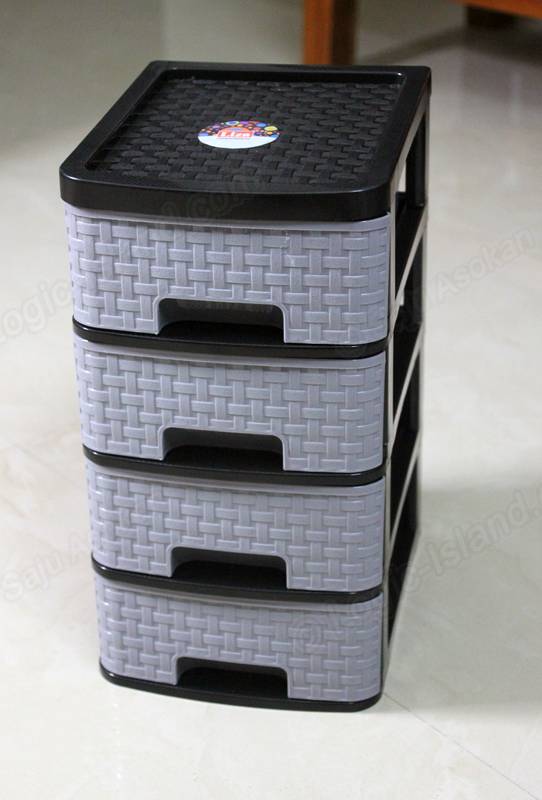
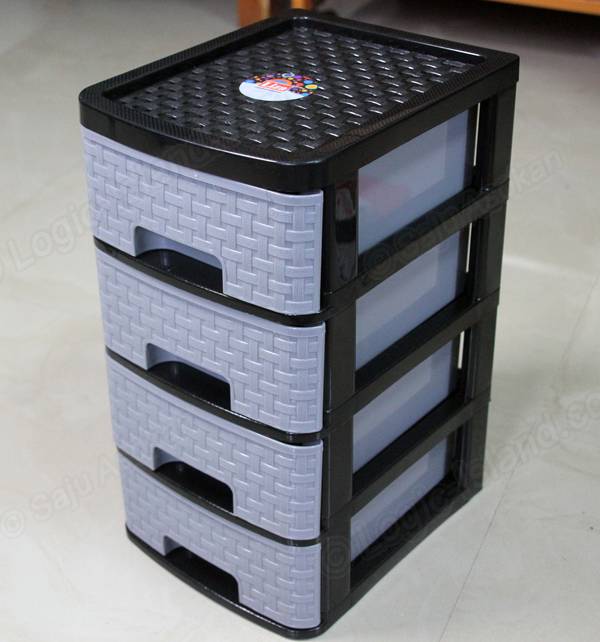
I’m happy that you are here. In this quick article I’ll walk you through my DIY project – building a trickle filter for my 600 gallon fish tank. I guess this project can’t get any cheaper than this – I made this one out of INR 400 (approx $6) multi tray drawer like utility box that you would find in many dressing tables. You can use pretty much any container that can be stacked one over the other. All we need is an arrangement that would let water trickle down freely through the filtering media. It is just that the stacked structure and frame made my work a lot easier and it was pretty cheap on amazon.
Warning: Please be warned that this DIY project involves some steps that necessitates mechanical and electrical skills. Please get necessary help from qualified personnel if you aren’t skilled enough to undertake it.
Let’s have a closer look:
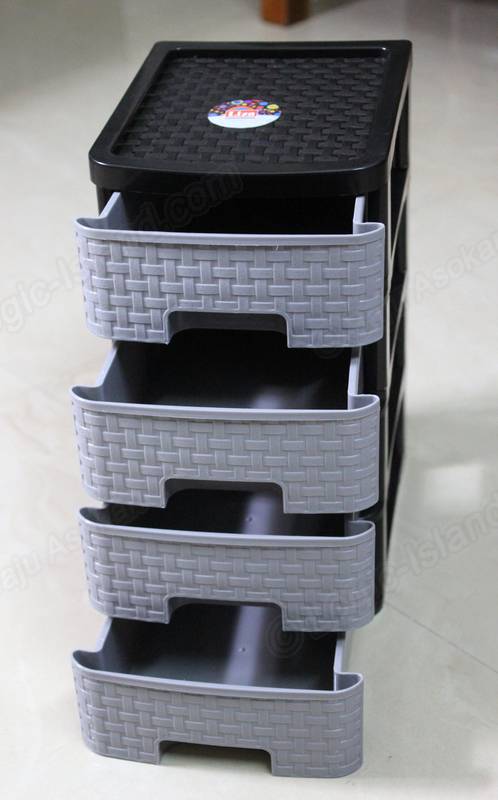
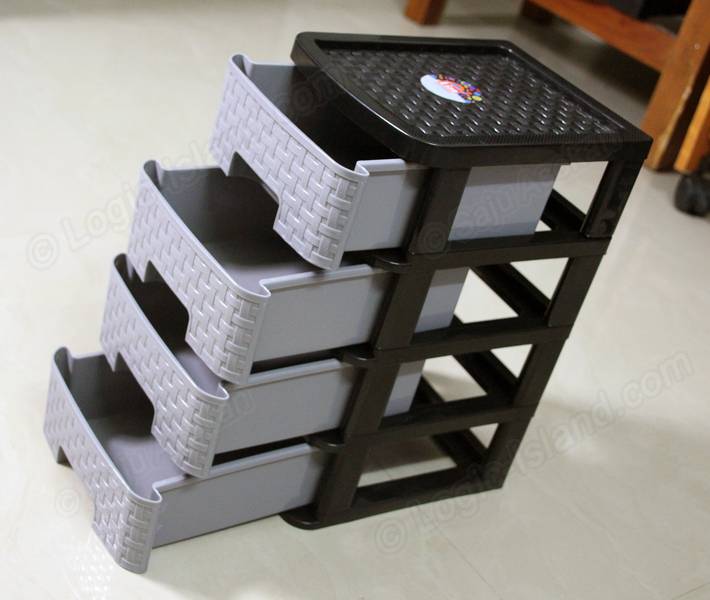
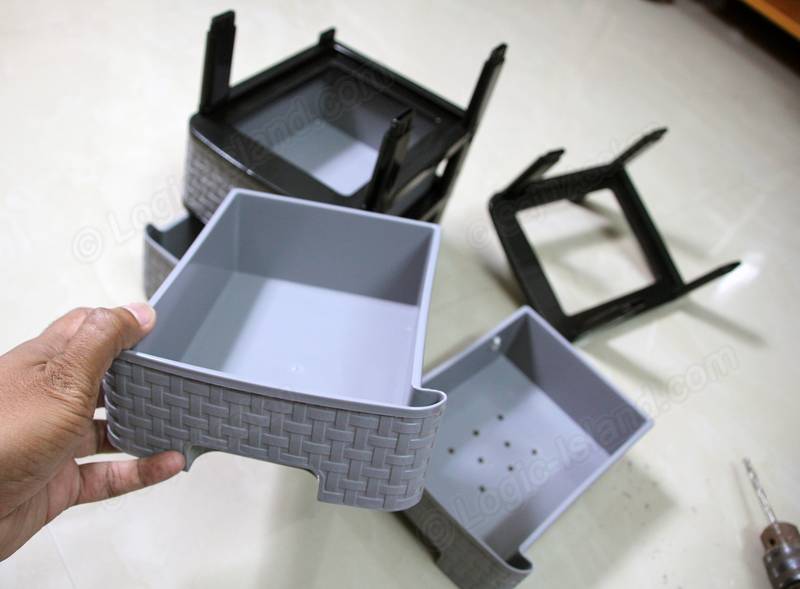
The box i bought has four drawer like compartments that can be pulled independently. The rear end of the drawer has a notch so that it won’t fall off unintentionally from the frame.
Whats the plan?
We’ll dedicate the top two drawers for sponge like filter medium that will trap most of the fine solid waste suspended in the aquarium water. Then we’ll drill holes in each drawer so that the water that pass through the filter medium will trickle down into the drawer placed immediately below, which subsequently perform more filtering on the water. The bottom two drawers will be filled with biological filtration medium like ceramic ring, bio balls or the like. I’ll add a UV filtering stage also in between.
Once the filtering setup is ready we’ll use a submersible pump or the output of your existing power head to pump water to the top drawer from where it gets trickled down back to the aquarium, getting filtered enroute.
Hint: Whenever you setup a multi stage filter like this one, always make sure that the mechanical filtration precedes the biological one. The biological filter media like ceramic rings work by letting water pass through its tiny pores where the beneficial bacteria neutralizes chemicals that are toxic to fish. If you keep the biological filter in the early stages of a multi stage filter, all the gunk from your tank water will clog these tiny pores rendering the biological medium ineffective in a very short while. Hence always have one or two sponge stages ahead of it.
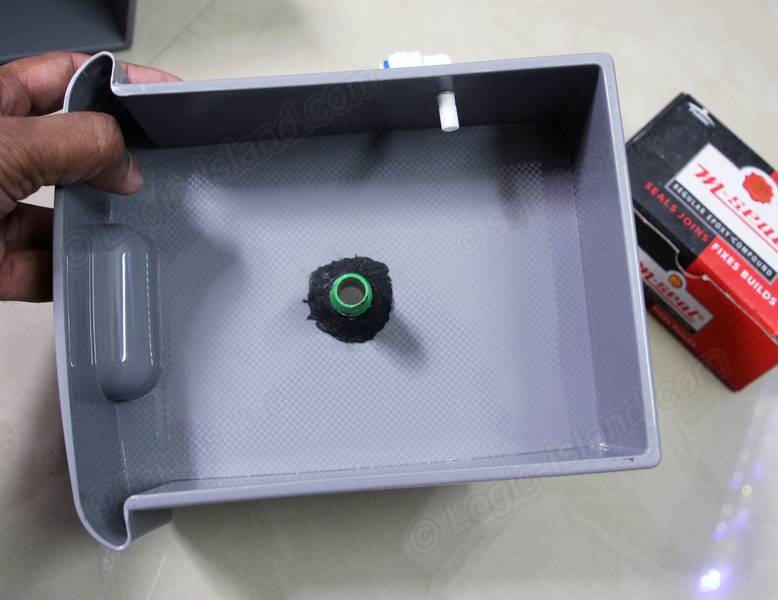
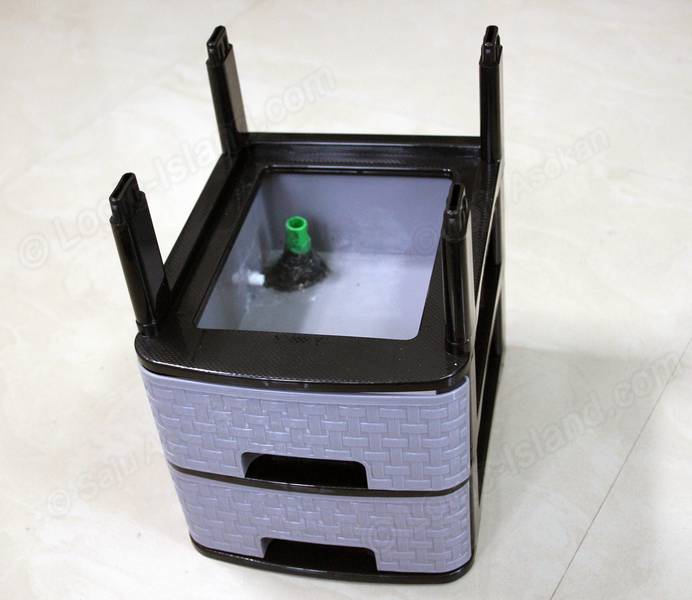
Step 1: Attach inlet nozzle to the top drawer
To remove the drawers, I need to remove the top surface and then each drawer can be taken out one by one. This is how the top drawer looks like. It has generous space and depth to house three layers of aquarium sponge.

Next I visualize where I would drill the hole for the inlet pipe.
Hint: You can get the 1/2 inch hose inlet from gardening supplies. I bought it from amazon.
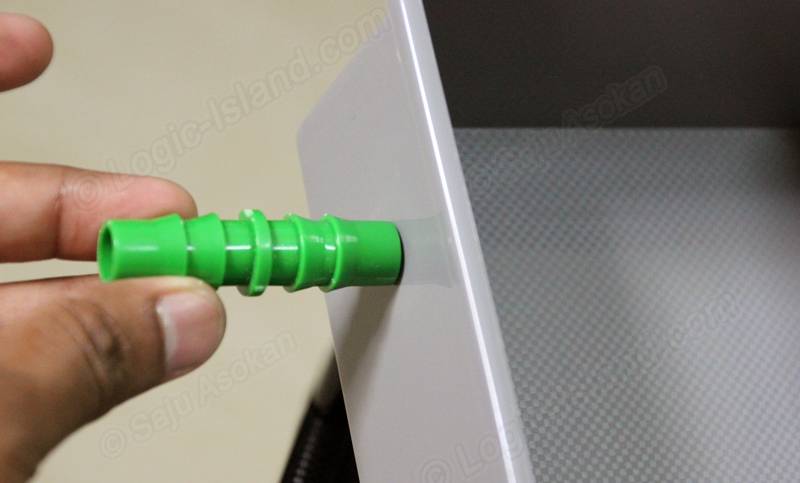
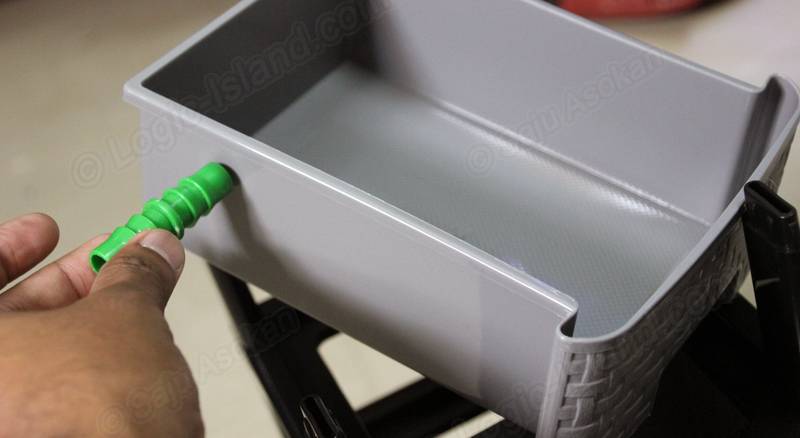
Use your hand drill with a wood bit (no impact mode, just drill mode will do) to give ample space for the inlet pipe to squeeze through.
Hint: If you don’t have a large enough drill bit, you can make hole with the one you have and then swirl the drill to enlarge the hole.

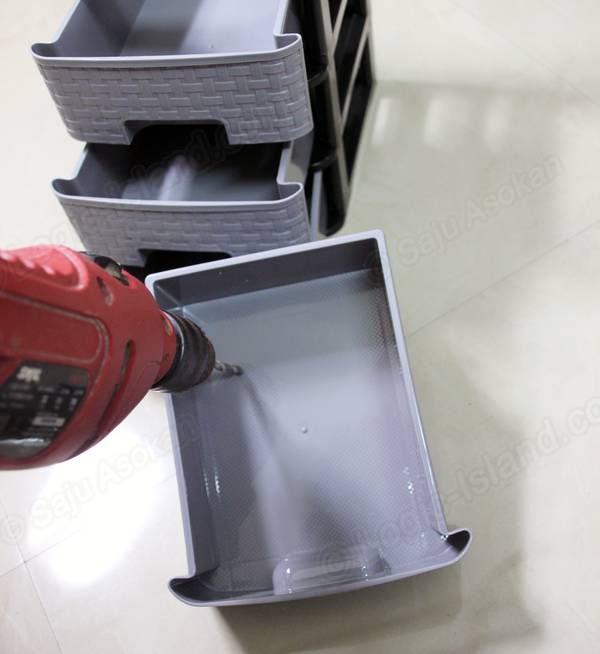
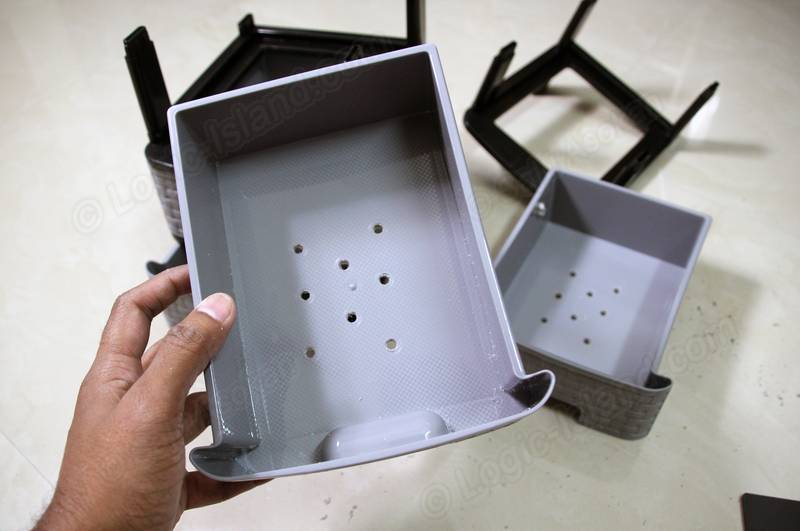
Step 2: Drilling the trickle holes for the aquarium water to flow through
Next, we need to make holes in the top two drawers (sparing the bottom two). You can be pretty generous while adding holes. If your submersible pump’s output is moderate, a handful of holes as shown below would be enough. I ended up increasing both the count and the hole size, when I discovered that my 40 watts pump resulted in overflow, when the holes weren’t sufficient for all the water to trickle down.
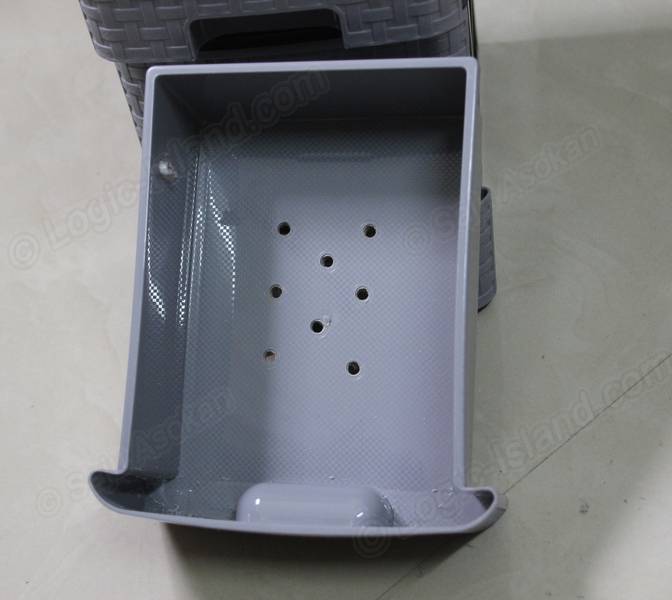
Keep doing this for all the drawers except the last two.
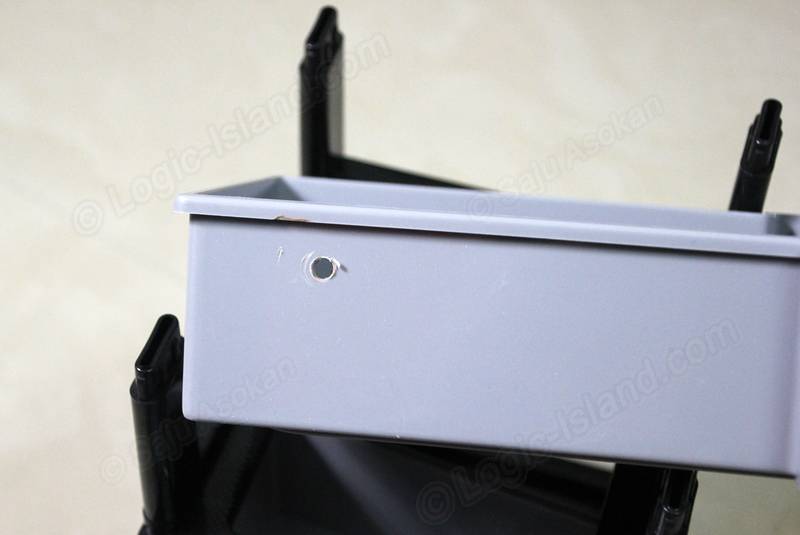
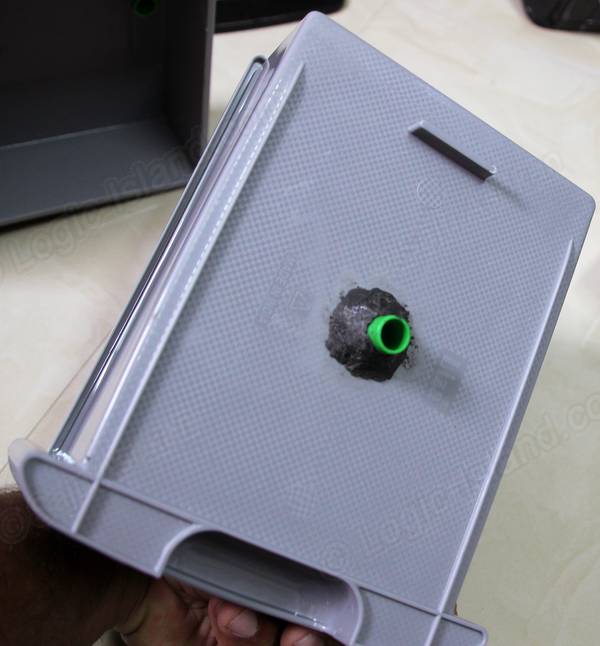
Step 3: Attaching single pipes instead of trickle holes to the bottom two drawers
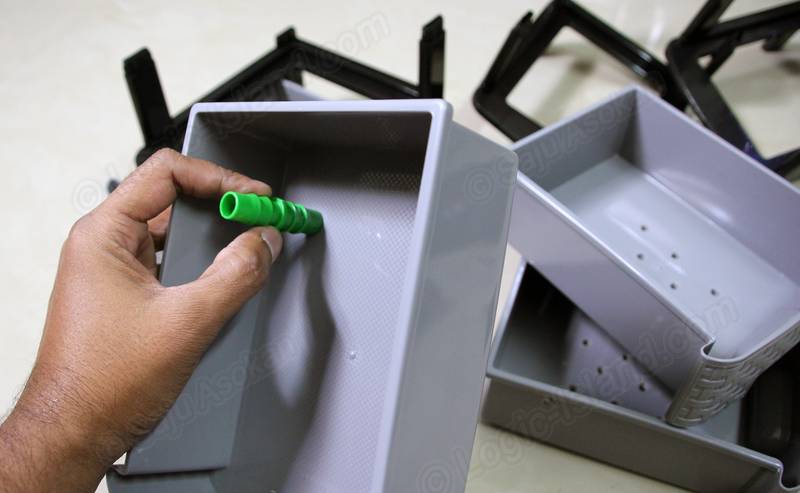
We prepared the top two drawers with multiple holes so that the sponge would filter the water and let the filtered aquarium water trickle down. However since the bottom two drawers are dedicated for biological filtration (ceramic rings, bio balls etc), we need water to stay up to the mid level of the drawer so that the filtering media stays immersed. The water that rises above that level needs to make it’s way down to the stage below. To facilitate this, we’ll drill a single hole and attach a hose connector. The top left hole and connector inserted in the pictures below is the one we are talking about. The pipe protruding into the drawer will make sure that water stays up to that level which ensures that the biological media stays immersed in water more.
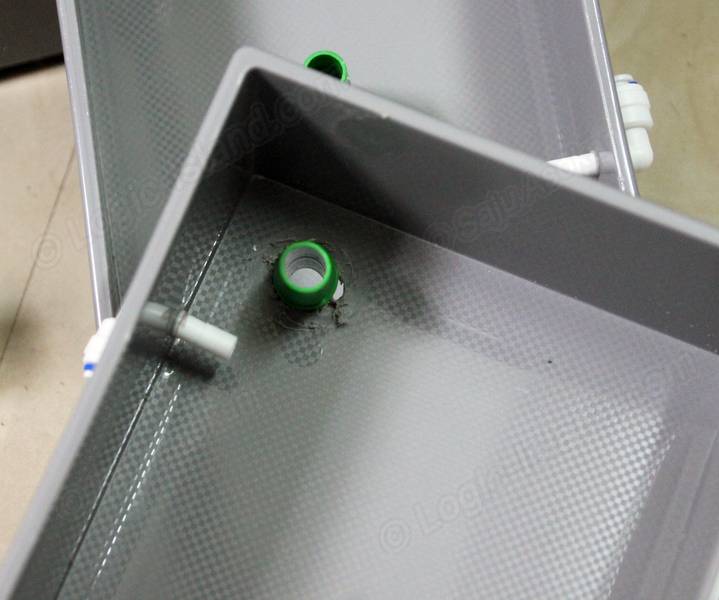
Step 4: Setting up the UV filter
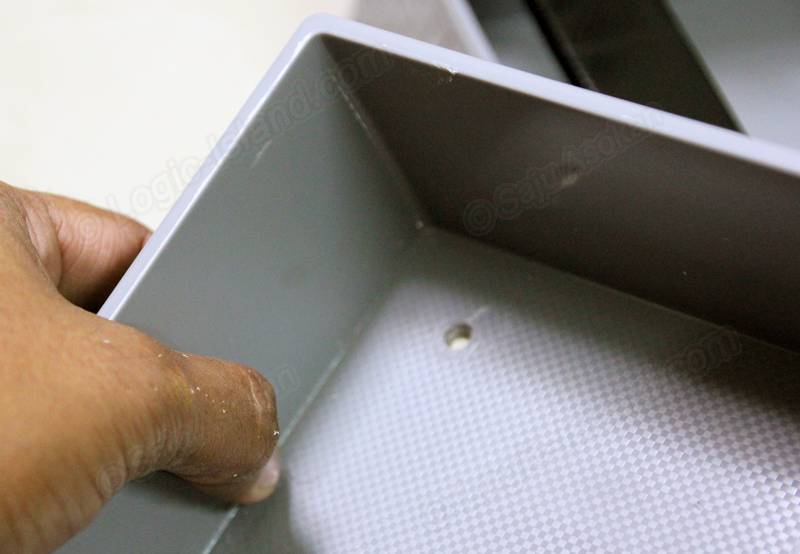
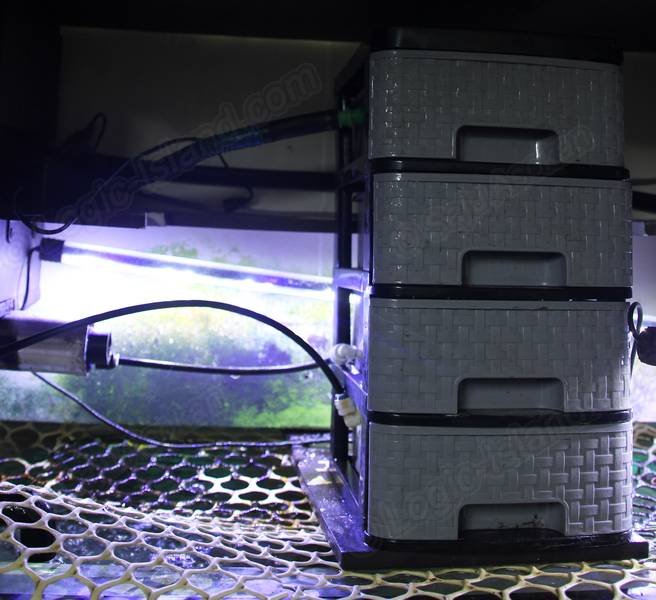
Did you notice the small white colored connector attached through the side wall in the picture above? That is part of the water UV purification kit that you can buy online. There are two such connectors that we’ll attach to the sidewalls of the bottom most two drawers. Make sure that the UV connector attached to the third drawer from above, stays just below the green pipe in the respective drawer (picture picture above). This makes sure that water will pass through the UV connector before overflow through the green pipe happens.
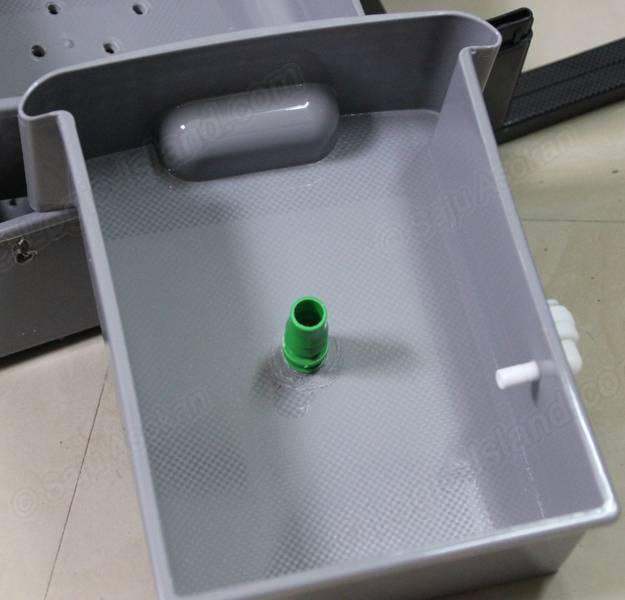
The below picture is that of the bottom most drawer which again houses the biological media. You can see that the UV filter’s inlet connector is drilled into the bottom most drawer’s sidewall as well. Make sure that the bottom most drawer’s UV connector lies above the green pipe’s level or the water from the drawer above won’t fall into this drawer.
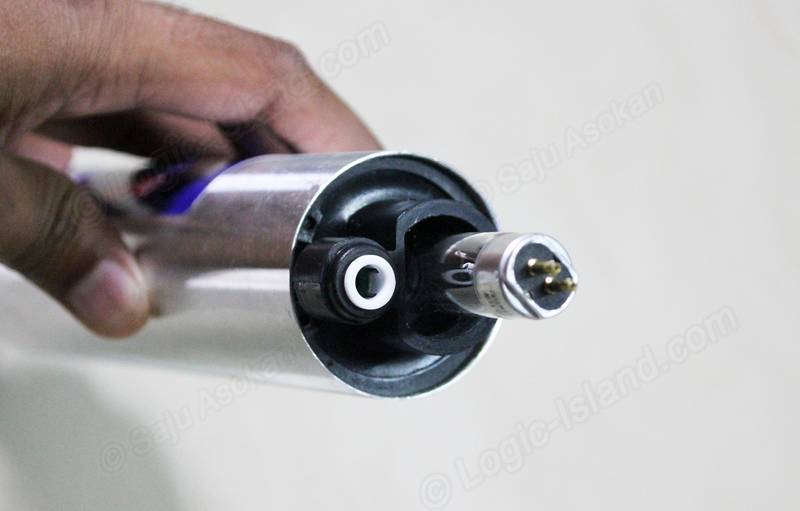
You might be wondering what is all the UV connectors all about. It is part of this ultraviolet filtering kit that you can see below. The central cylinder has two similar 4mm connectors at both ends (white fringe). The third drawer’s (from above) UV connector will be connected to one end of the below cylinder (the white connector end) using 4mm gardening feeder pipe. The other end of the UV cylinder apparatus will be connected to the bottom most drawer through another 4mm pipe. This completes the circuit and water from the third drawer above will flow through the UV filtering cylinder and then goes into the bottom most drawer.
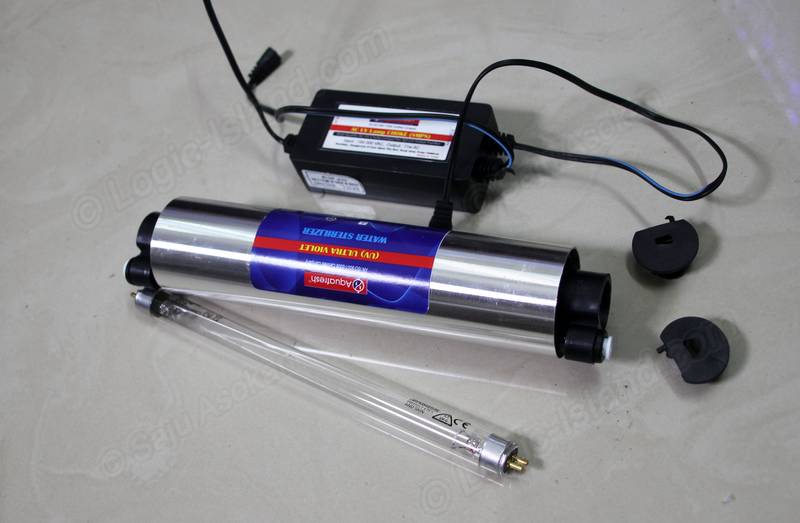
But what benefit do we have if we run water through this strange apparatus? The answer to it lies in the below picture. The water that you pass through the 4mm connector flows through the cylinder that has a transparent inside. The lamp like device inserted into the bigger hole is a UV lamp. Once you plug in power, the UV lamp shines into the water that pass through the device and all nasty germs gets fried to death.
The UV filtering kit usually comes with the power adapter as well that you can see in the picture above (top most rectangular box). The power adapter’s output will have two ends, each of which goes to either end of the UV tube lamp.
Note: UV stage shown above is just an optional component in the trickle filter and can be omitted if you feel so. The UV filtering is an additional stage of protection to make sure that my aquarium water is free from not just toxic chemicals, but pathogens as well.
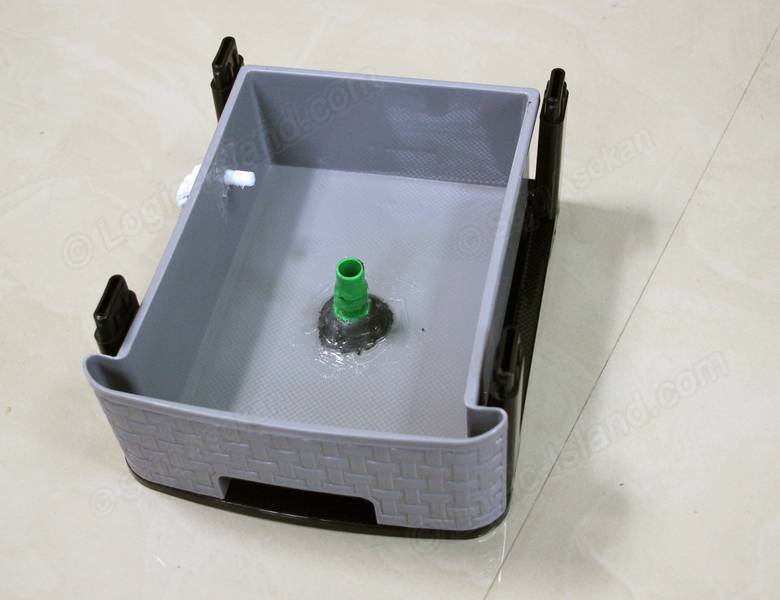
Step 5: Water proofing with Epoxy compound
This stage is quite self explanatory with the picture below. Wipe the surface clean and apply epoxy around the outlet pipe’s so that water won’t flow through unintended gaps.
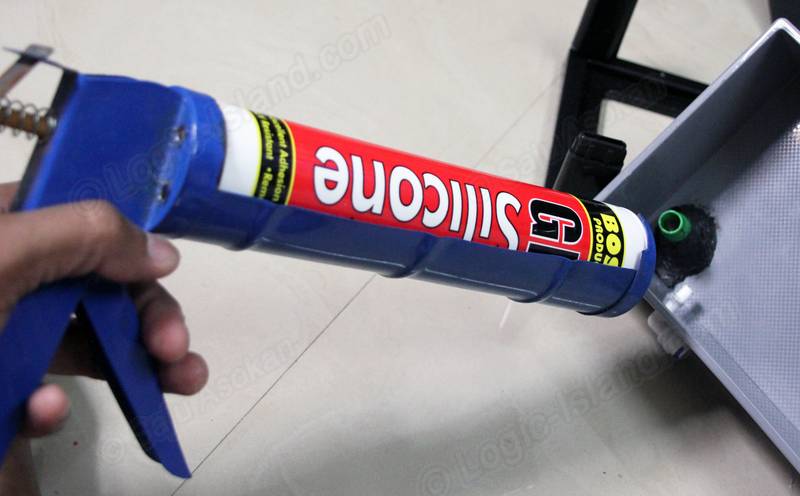
Step 6: Not even a drop of water to be spared. Silicone sealant
By no means necessary, but adding an extra layer of protection from leaks using aquarium grade silicone glue on all the drawer’s outlet and inlet pipes is good. Make sure that the glue is allowed to cure for 24 hours and wash the drawers well after curing.
Step 7: Assemble it all together
Here goes the bottom most drawer that is dedicated for bio filter media.

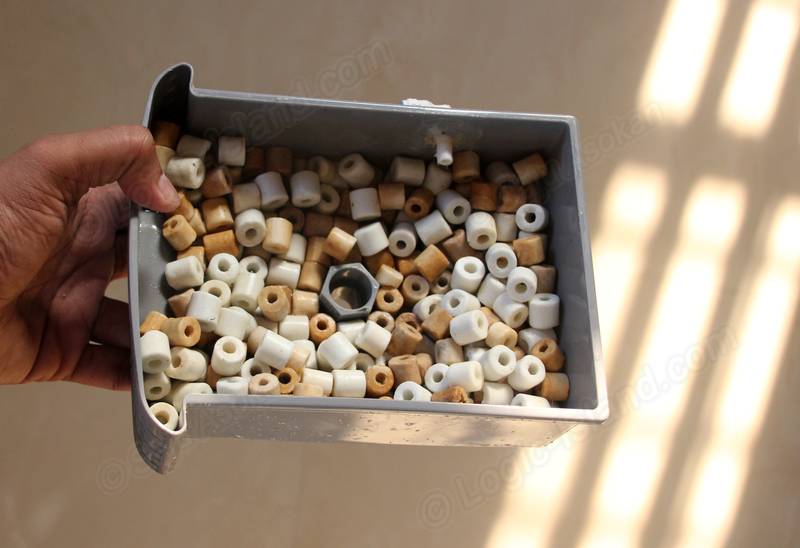
And the next one again dedicated to the ceramic rings and bio balls.
The trickle sponge filter housing.
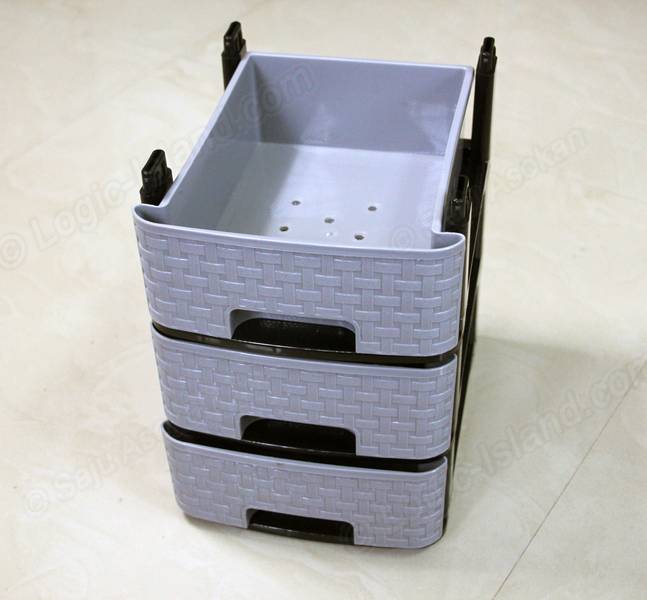
And the top most drawer with the inlet pipe attached to it, that will house the sponge filter within. Here’s where the water from the submersible pump or your aquarium’s power head lands.

Placed the lid to seal the unit. The second image below shows the external opening of the water inlet pipe (green) and the UV filter’s connectors on the bottom most drawer and on the one above it.

Step 8: Fill in all the filter media you want
Here’s the bottom most drawer after filling in ceramic rings. Make sure you won’t overcrowd the container causing the filter media to fall through the outlet pipe.
Similarly cut and place sponge layers on the top drawers.

Step 9: Position the filter unit above your tank
Depending on your aquarium’s dimensions, you may need to prepare a tray to keep above your fish tank’s glass wall. The tray acts as a horizontal platform on which you can keep the trickle filter setup. I used plastic based multi board to cut a rectangle that would fit across the width of my fish tank. Make sure that you use water proof material to build the tray, as there is always chances of water getting into contact with it. Drill large holes in the tray into which the bottom most drawers’ outlet pipe can fit in.

Step 10: Connect water and power to give life to your filter
Connect the output of your submersible pump or power head to the filter’s top inlet connector using a 1/2 inch hose. Plug the pump or power head into the wall socket and switch it on. If you did the UV filter setup as well, make sure that you power it preferably using a socket controlled via an independent switch. Water should now flow into the top drawer, trickle down through the sponge and bio filter media back into the tank. The UV filter will deactivate pathogens through a parallel stream meanwhile.

Long term maintenance
The trickle filter is a breeze to maintain. Turn off power to the pump and UV filter. Now proceed to slide out the top two drawers and take out the sponge. Rinse the sponge in water gently. It is better that you rinse it inside a bucket, so that the fertilizer rich waste water can be used to irrigate your garden. Keep in mind that if you overdo the rinsing, you may end up drain down the sink all your beneficial bacteria as well. No need to panic though, as you still have the bottom two drawers full of ceramic rings, that should be colonized by loads of beneficial bacteria. They will spread back to the cleaned sponge filter as well, once water starts flowing through it.


Thank you for sharing excellent informations. Your web-site is so cool. I’m impressed by the details that you have on this blog. It reveals how nicely you perceive this subject. Bookmarked this website page, will come back for more articles. You, my pal, ROCK! I found simply the information I already searched everywhere and simply could not come across. What a great site.
Thank you for your awesome comment. Cheers.